
Adobe Photoshop has received an incredible upgrade with the introduction of Generative Fill. This new feature brings AI capabilities to the already powerful Content-Aware Fill tool, making it even easier to remove subjects from images seamlessly. If you’ve ever used Photoshop, you know the challenges of removing subjects without leaving any traces, especially when dealing with complex images. Content-Aware Fill works by analyzing the surrounding pixels and textures to seamlessly replace the selected area with content that matches the surrounding context, However With Generative Fill, the power of Adobe’s Firefly image generation technology comes into play. It can generate objects, backgrounds, extend images, and remove objects non-destructively, creating new images on their own layer.
How to Access generative fill
To install Generative Fill, it’s important to note that it is still in beta at the time of writing this post.
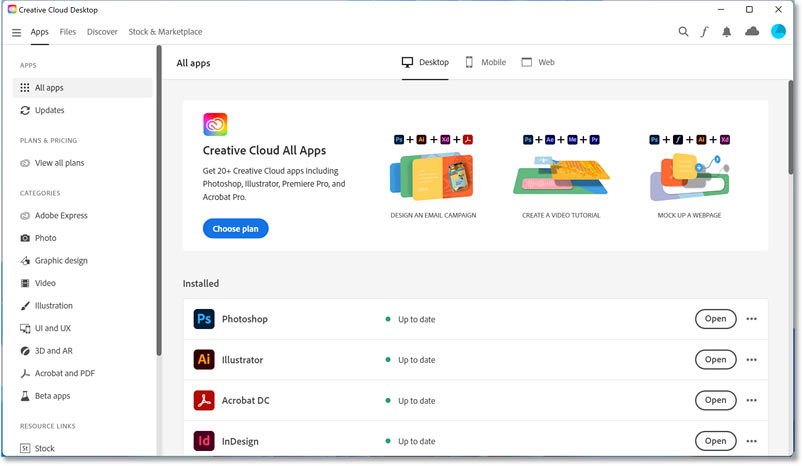 To access it, you’ll need to have a Creative Cloud app installed and an account. In the Creative Cloud desktop app, navigate to the beta apps section and install Photoshop (beta). Once installed, go to the “Edit” menu in Photoshop, where you’ll find the newly added “Generative Fill” option. Click on it, and a contextual taskbar will appear with a text entry prompt. If you don’t see it by default, go to “Windows” and ensure that the “Contextual Taskbar” is selected. And just like that, you now have image generation capabilities within Photoshop.
How to use Generative fill
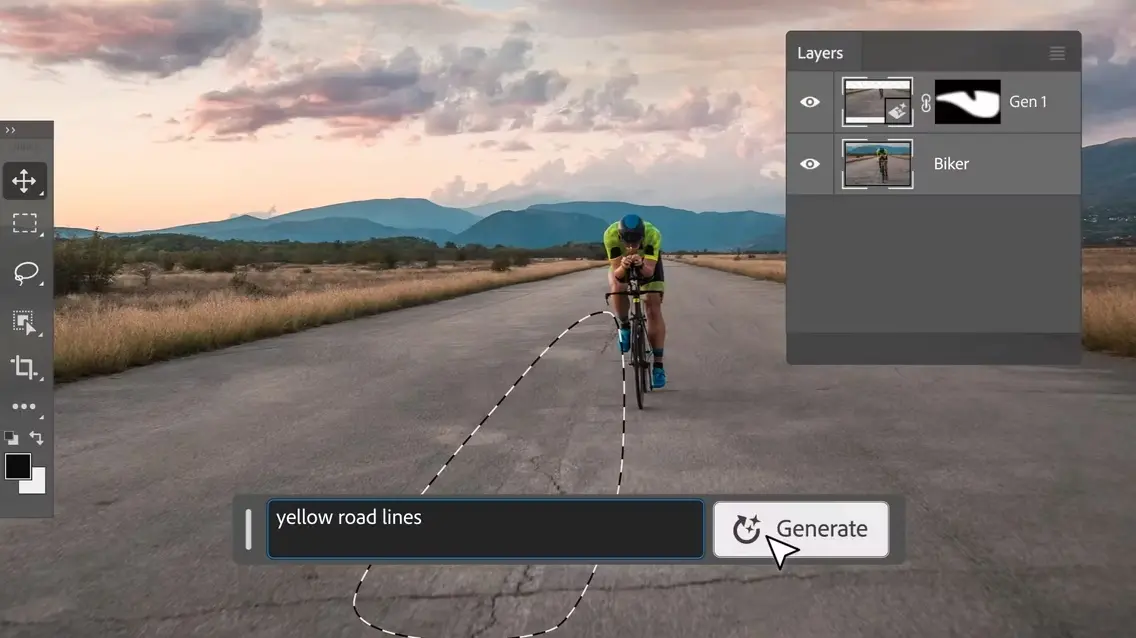
Using Generative Fill is straightforward. Open an image of your choice and make a selection around the object or area you want to work with using any selection tool available. Then, click on “Generative Fill” under the “Edit” menu or right-click with the selection active and choose “Generative Fill” from the menu. A text entry prompt box will appear, allowing you to describe how you want the generated image or background to be.
 Keep in mind that this is optional, as Generative Fill can generate content based on the surroundings. After entering your prompt, click “Generate," and a new generative layer will be created in the layers panel, giving you the flexibility to edit the properties of the generated fill or revert back to the original image without any destructive impact.
As mentioned earlier in the blog about Firefly, Adobe’s image generation technology delivers results in seconds, and the same applies to Generative Fill. You’ll be presented with three variations to choose from, allowing you to select the one that best suits your preferences. If you want more generations, simply modify the text prompt and click “Generate” again.
 It’s important to note that, currently, Generative Fill in Photoshop (beta) only supports English language prompts. Additionally, when describing your scene, use descriptive nouns and adjectives instead of instructive prompts like “create” or “fill the layer."
Generative Fill Features: Extending the Background
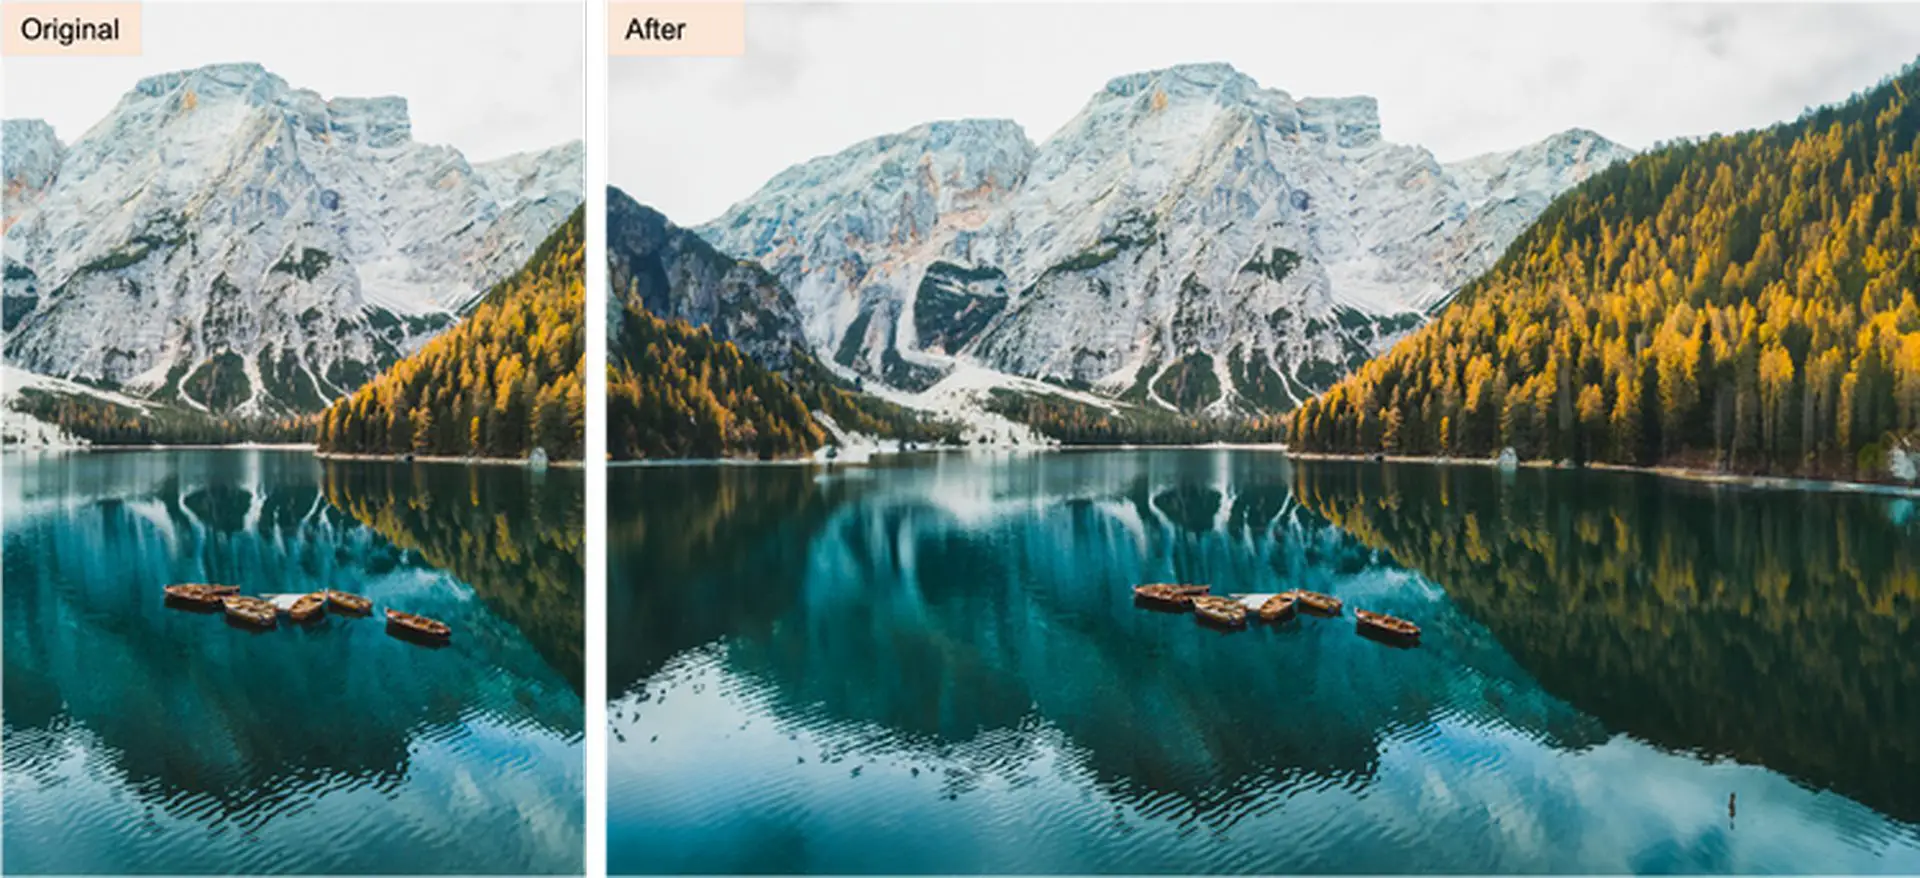
Generative Fill also offers some fantastic features, such as extending the background. This feature allows you to seamlessly extend images, providing a more expansive canvas. To unlock this feature, select the Crop Tool from the toolbar and drag the selected canvas outward as if you were extending it. Then, use the Rectangular Marquee tool to select the extra canvas by clicking and dragging. Following the same approach mentioned above, click “Generate” to create a background extension.
Genarative Fill Features: Removing subjects
Another remarkable feature of Generative Fill is its ability to remove subjects from images. Select the object you want to remove using any selection tool (the Rectangular Marquee tool is recommended). In the contextual bar, you can either leave the prompt empty or use descriptive words to specify how you want the subject to be removed. Then, click “Generate."
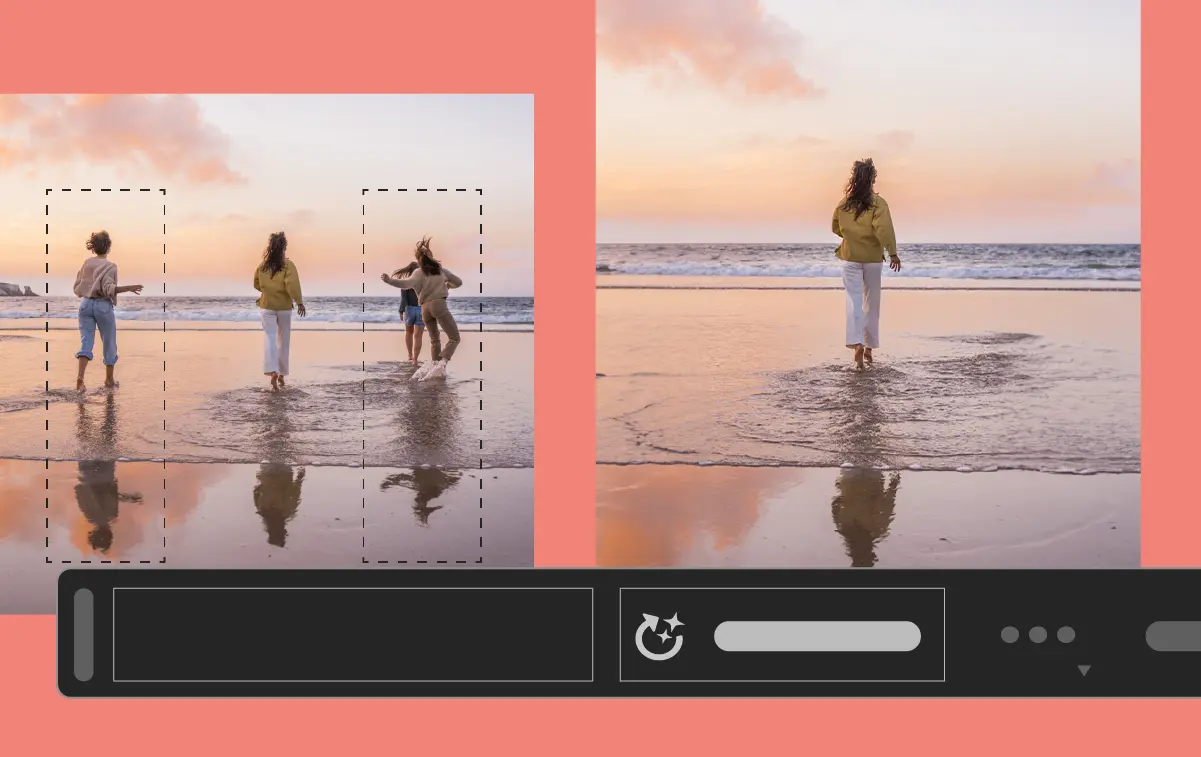
It’s worth mentioning that using a loose selection is advised, as including parts of the surrounding objects helps achieve a seamless blending effect. With Generative Fill, the possibilities are endless, whether you’re adding objects, extending backgrounds, or removing subjects from your images.